쉽고 빠르게 수준 급의 GitHub 블로그 만들기 - jekyll remote theme으로
.github.io라는 url로 익숙한 GitHub Pages는 개인 블로그, 특히 개발 블로그 용으로 인기가 높습니다. 이 글에서는 가장 간단하게 수준 급의 GitHub Pages로 static 페이지를 호스팅하는 방법을 소개해 보겠습니다.
이미 많은 글들이 GitHub Pages를 사용하는 방법을 설명하고 있지만, 이 글에서 소개하는 방법은 다음과 같은 특징이 있습니다.
- 쉽고 빠르다 : 프로그램 설치가 없습니다. 이 글에서 소개하는 방법으로는 로컬 컴퓨터에 Ruby, Jekyll 등의 프로그램을 설치하지 않고도 블로그를 만들 수 있습니다. 그렇기 때문에 누구나 쉽게 10분 만에 따라할 수 있습니다.
- 수준 급이다 : 수백 개가 넘는 Jekyll theme이 이미 공개되어 있습니다. 이 글의 방법은 그 중 직접 마음에 드는 theme을 선택하고 그대로 내 블로그에 쓸 수 있게 해줍니다. 덕분에 프론트에 대한 고민 없이도 수준 급의 멋있는 블로그를 가질 수 있습니다.
그럼 시작해 볼까요?
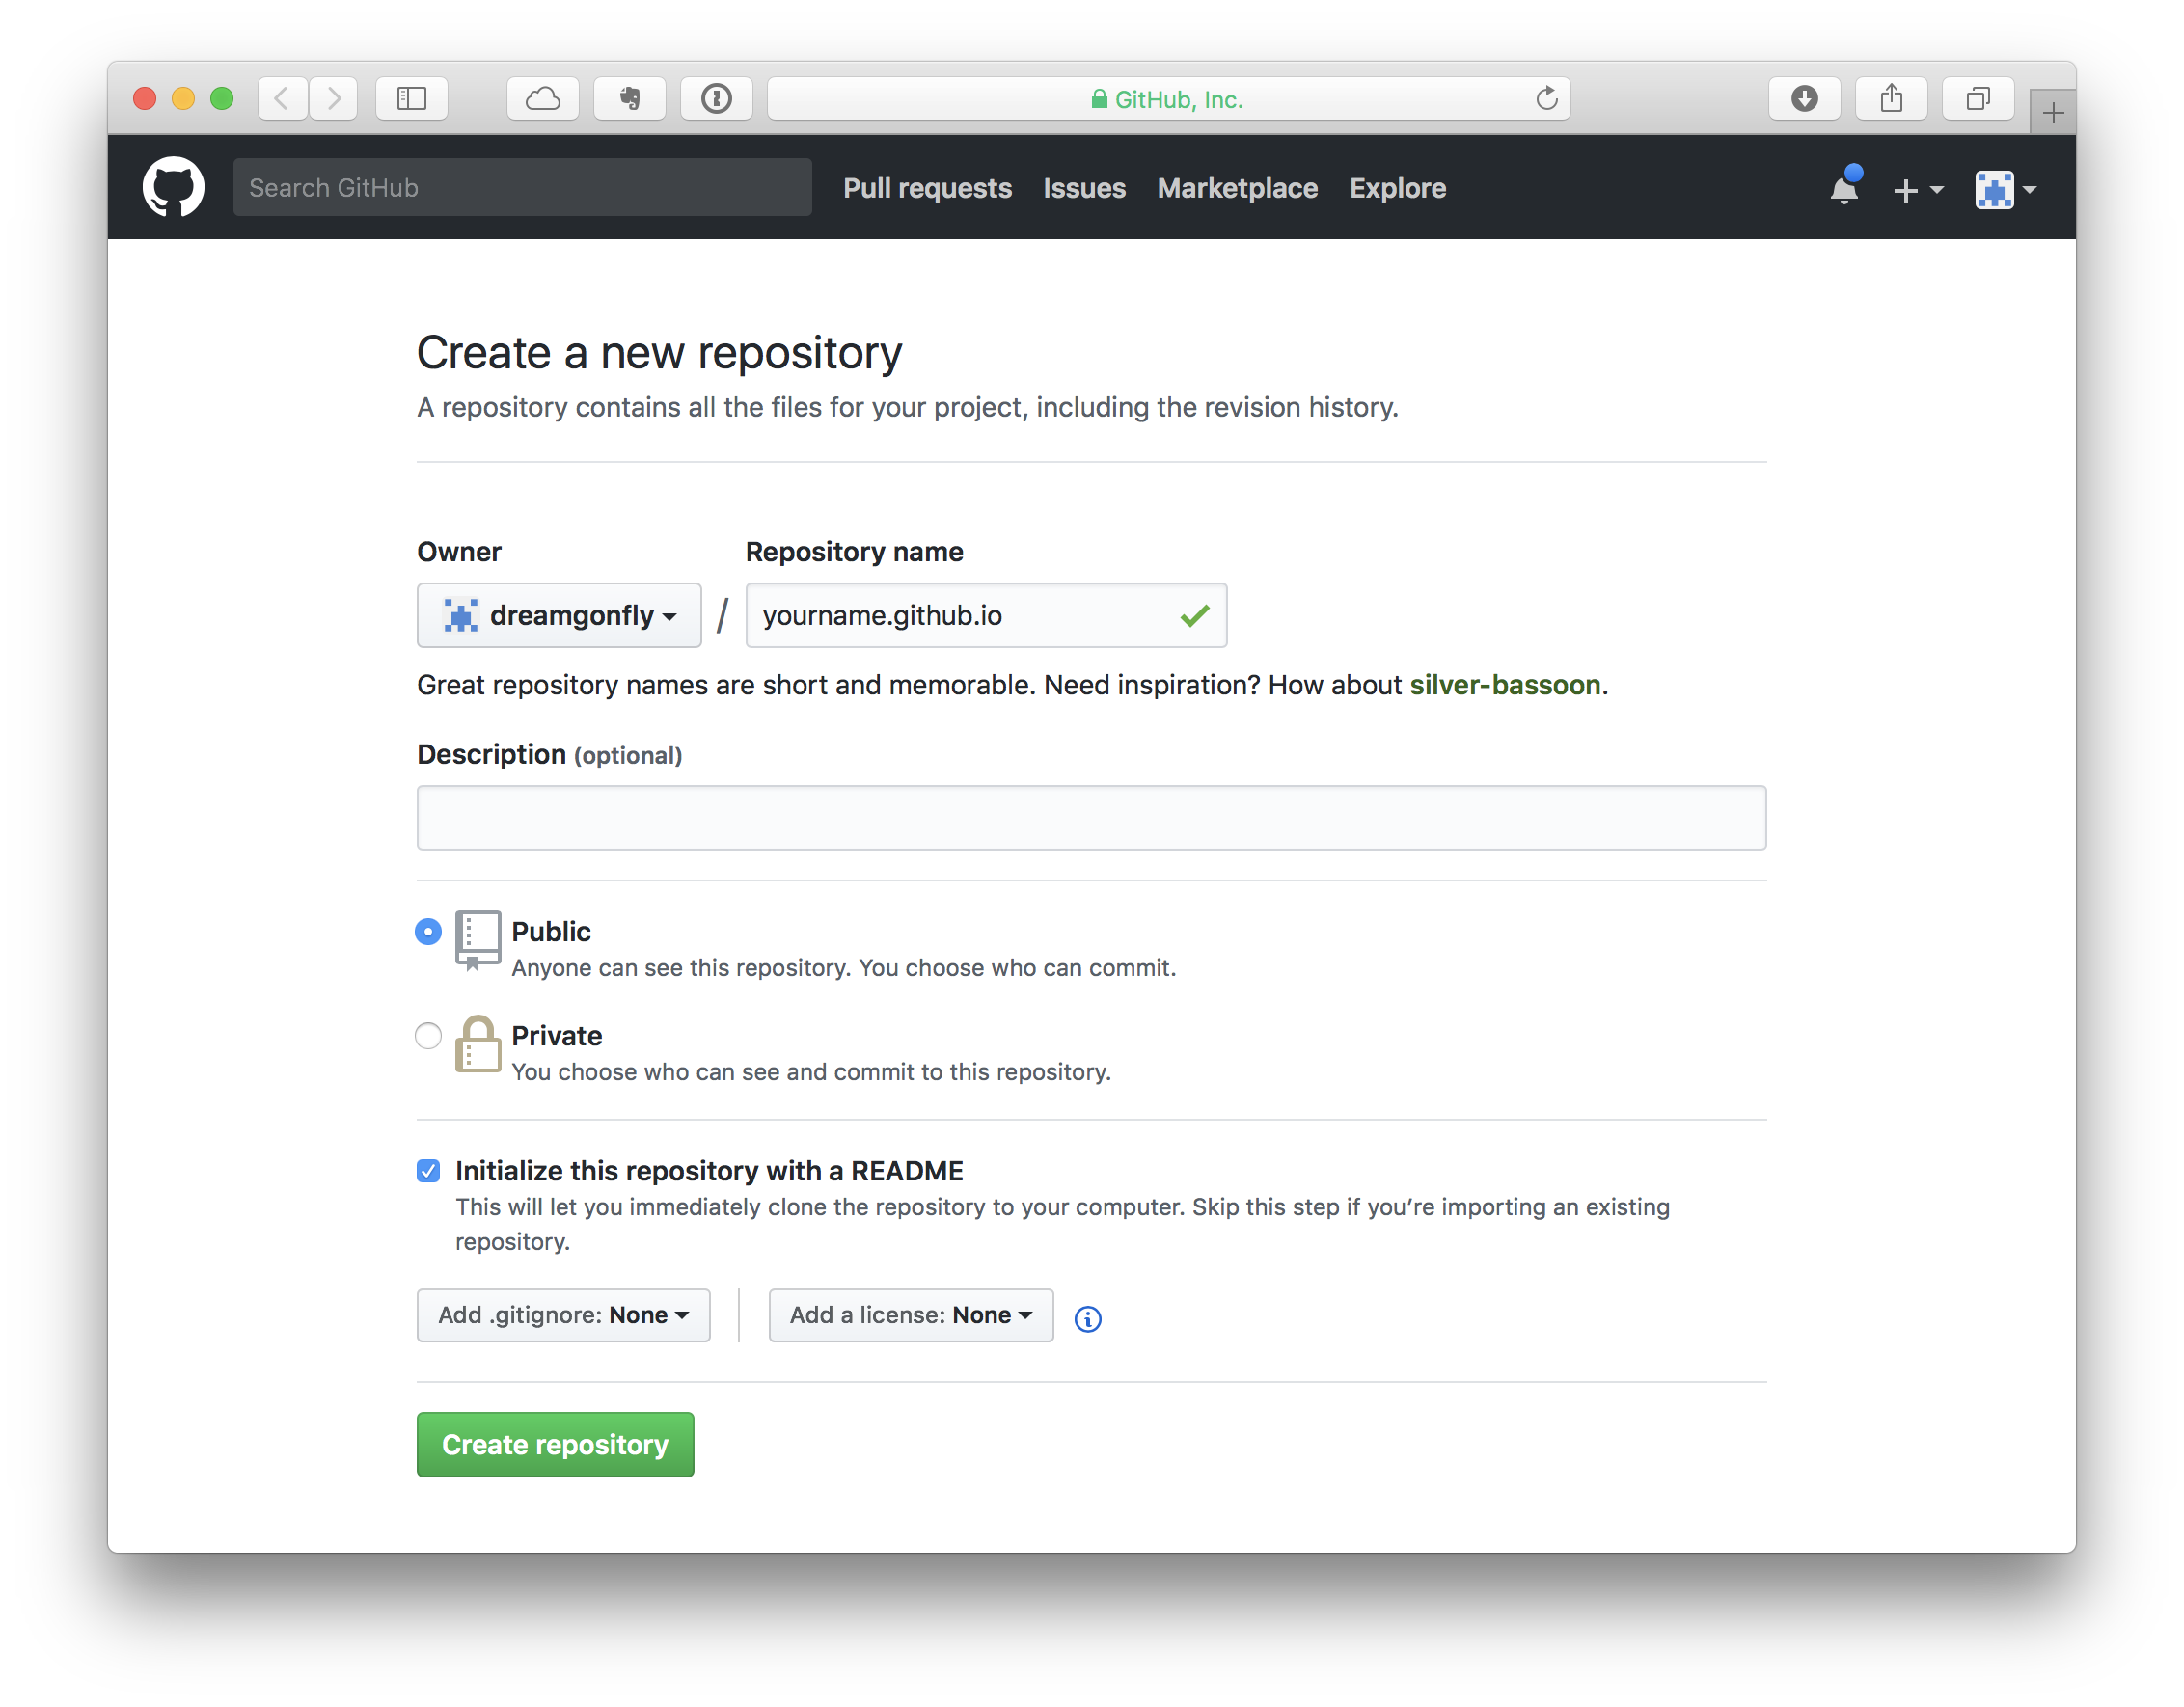
1. 새 저장소(repository) 만들기#
GitHub에서 새 저장소(repository)를 만듭니다. 이 때 저장소의 이름을 자신의 username 뒤에 .github.io가 붙은 이름으로 짓습니다. 이렇게 해야 yourname.github.io의 도메인으로 접속할 수 있는 블로그가 됩니다.
프로젝트 별 페이지 만들기
프로젝트 별로 페이지를 만들 수도 있습니다. 이 때는 프로젝트 이름이
yourname.github.io가 아니어도 상관 없으며 이미 존재하는 프로젝트에 페이지를 만들 수도 있습니다. 다만 이렇게 만든 페이지는yourname.github.io/projectname의 url로 접속하게 됩니다.
2. 마음에 드는 Jekyll 테마 찾기#
GitHub에는 이미 수백 개의 Jekyll 테마가 공개되어 있습니다. jekyll-theme이라는 topic을 갖고 있는 repository는 모두 공개된 jekyll 테마인데요. 이 중 어떤 테마든 내 블로그에 적용하고 싶은 테마를 선택해 보세요.
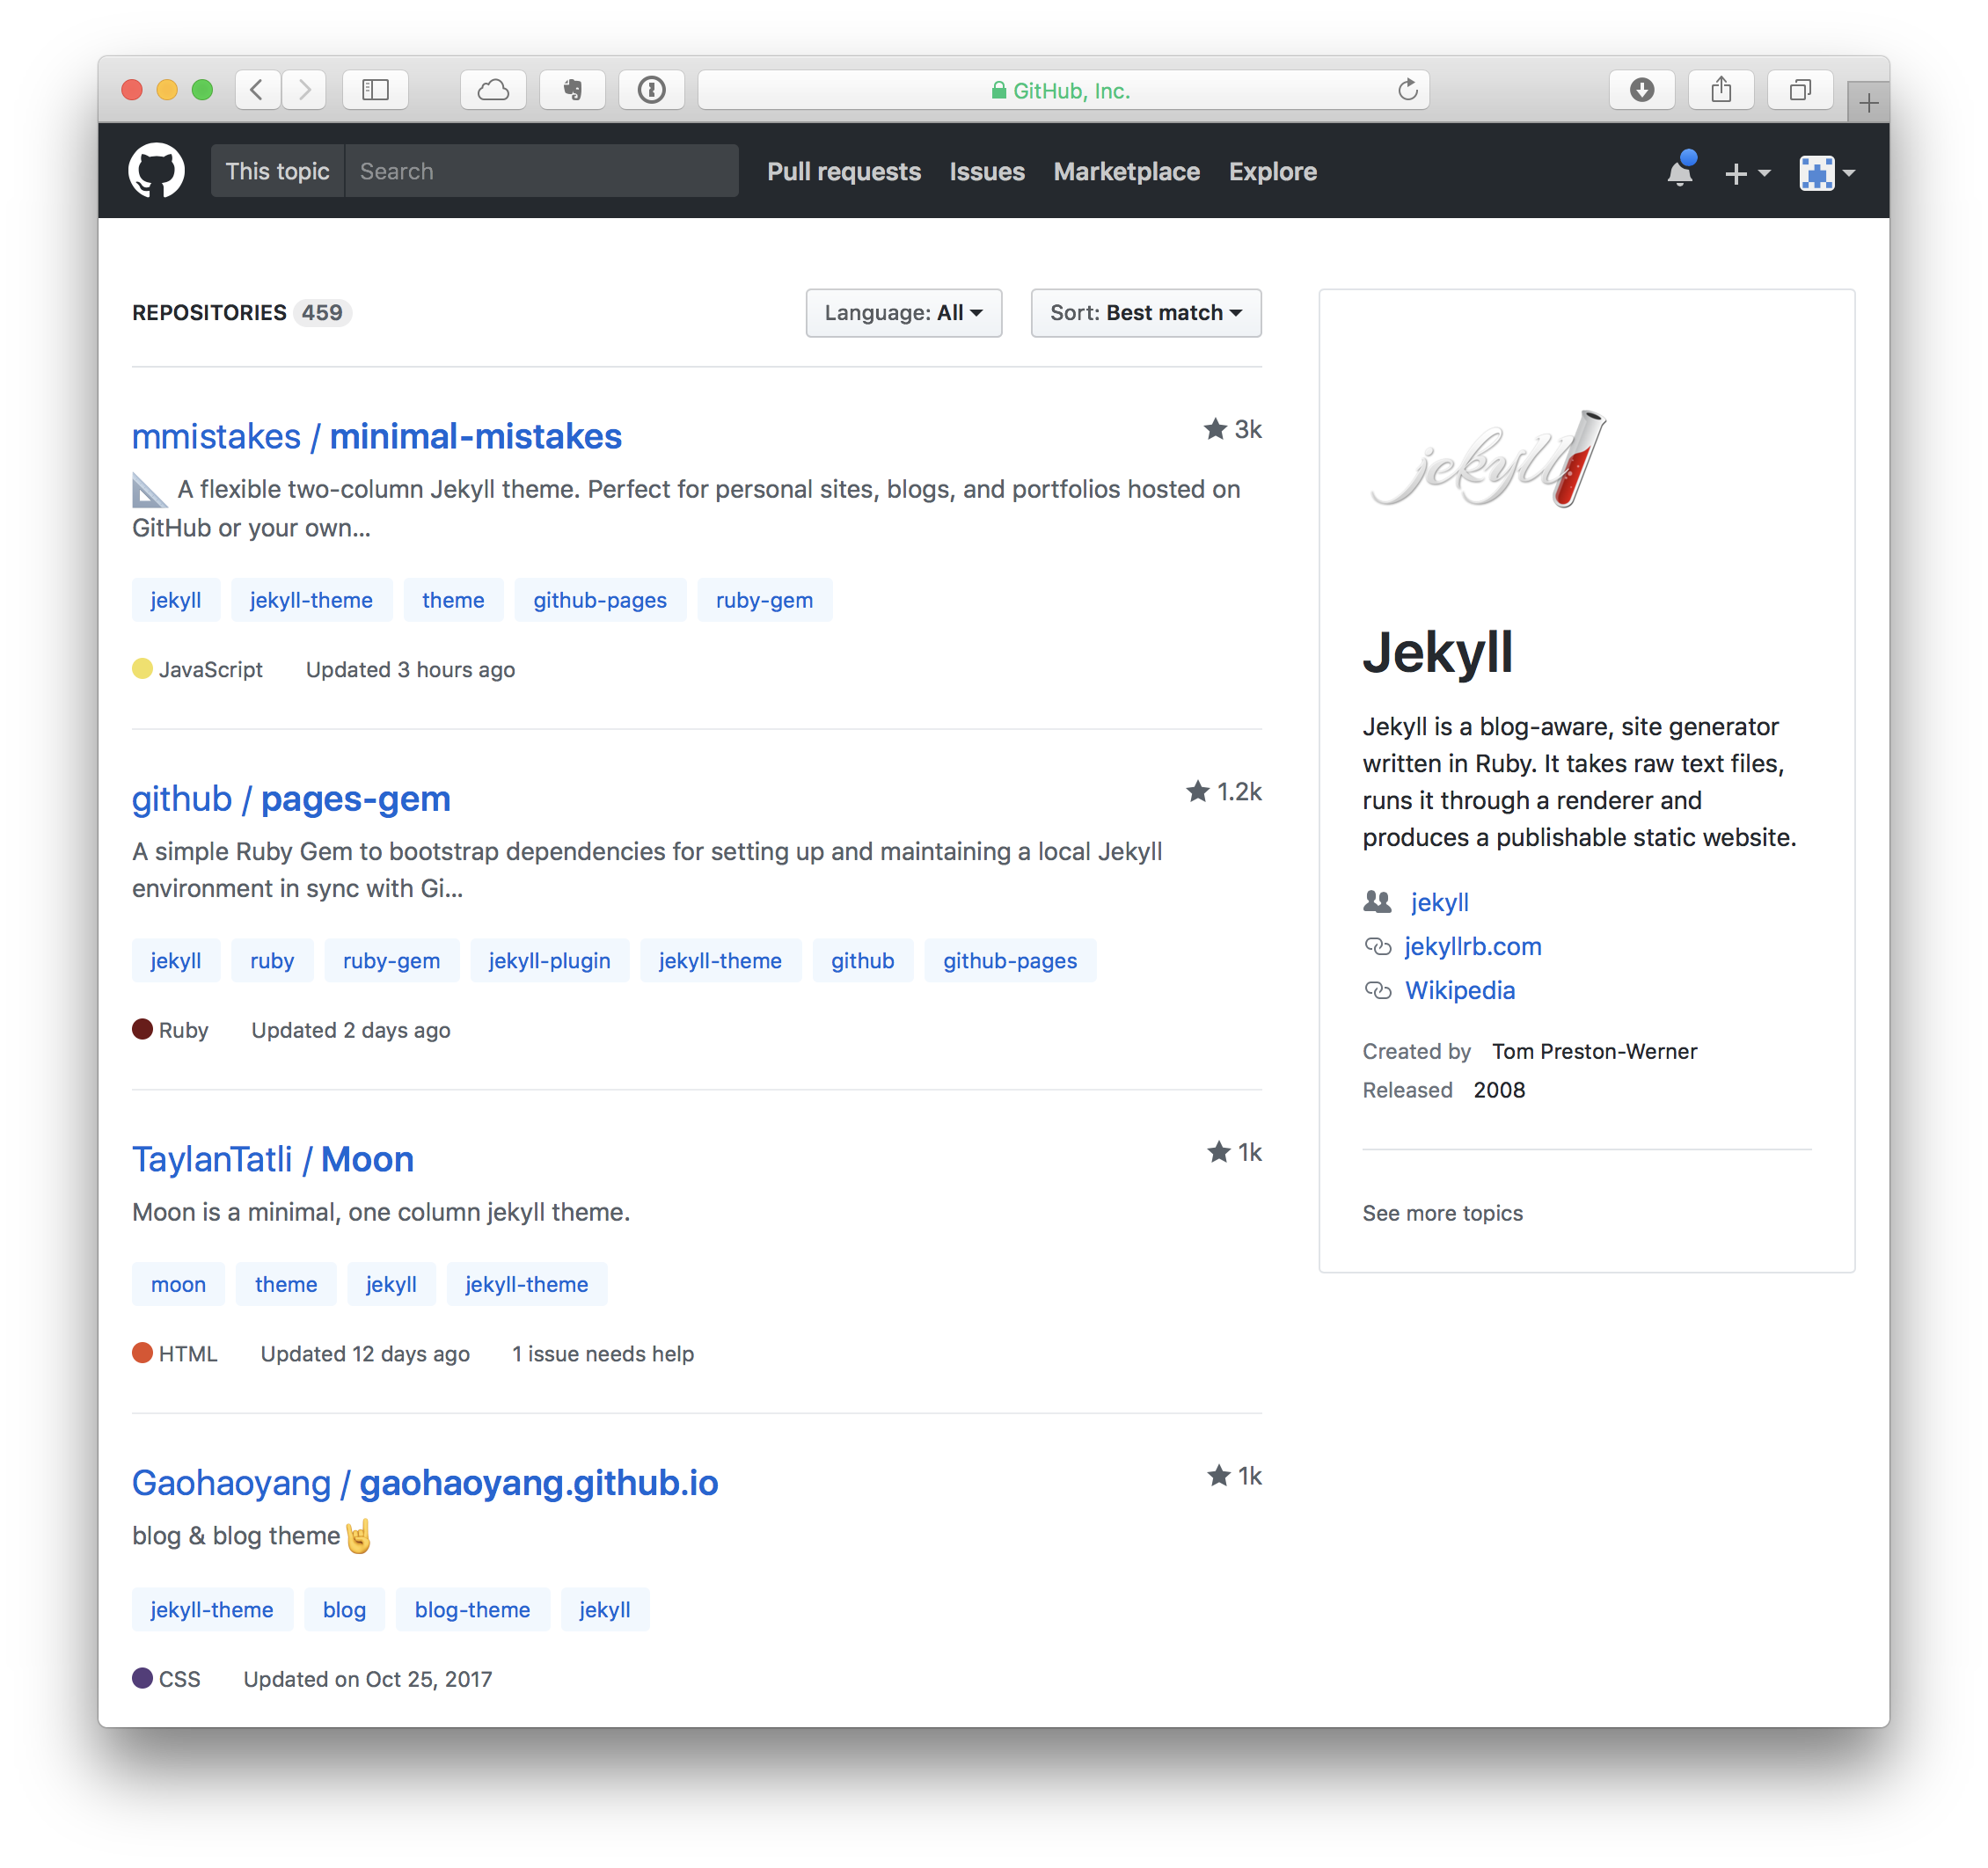
이 글에서는 테마 리스트에서 가장 위에 보이는 minimal-mistakes라는 테마를 사용해 보겠습니다.
3. _config.yml 파일 가져오기#
- 선택한 테마 저장소(repository)에 들어가서
_config.yml라는 파일의 내용을 복사합니다. 이때 Raw를 누르면 군더더기 없이 파일의 내용만 볼 수 있습니다. 이 파일은 모든 Jekyll 사이트가 갖고 있는 설정 파일입니다. - 자신이 방금 만든 저장소(repository)에 똑같이
_config.yml이라는 이름의 파일을 만들고 복사한 내용을 붙여넣기 합니다. - 이 파일에서 다음과 같이 한 줄을 추가하고 두 줄을 변경해야 합니다.
다음과 같은 한 줄을 추가합니다.
remote_theme : mmistakes/minimal-mistakes
이는 remote_theme을 지정하는 설정이며 GitHub의 OWNER/REPOSITORY 의 형식으로 이루어집니다. 아래는 mmistakes라는 owner의 minimal-mistakes라는 저장소의 Jekyll 테마를 가져오겠다는 뜻입니다.
다음과 같이 설정 중에 url과 baseurl 두 줄을 수정합니다. url은 yourname을 자신의 username으로 바꾸어야 하며, baseurl은 빈 문자열로 두어야 합니다.
url                      : "https://yourname.github.io" # the base hostname & protocol for your site e.g. "https://mmistakes.github.io"
baseurl                  : "" # the subpath of your site, e.g. "/blog"
프로젝트 별 페이지 만들기
프로젝트 별 페이지를 만들 때 baseurl은
/projectname처럼 써야 합니다. 이렇게 두어야https://yourname.github.io/projectname의 url로 접속할 수 있습니다.
제가 선택한 minimal-mistakes의 원본 _config.yml 중 일부분을 가져와 보았습니다.
# Welcome to Jekyll!
#
# This config file is meant for settings that affect your entire site, values
# which you are expected to set up once and rarely need to edit after that.
# For technical reasons, this file is *NOT* reloaded automatically when you use
# `jekyll serve`. If you change this file, please restart the server process.

minimal_mistakes_skin    : "default" # "air", "aqua", "contrast", "dark", "dirt", "neon", "mint", "plum", "sunrise"

# Site Settings
locale                   : "en-US"
title                    : "Site Title"
title_separator          : "-"
name                     : "Your Name"
description              : "An amazing website."
url                      : # the base hostname & protocol for your site e.g. "https://mmistakes.github.io"
baseurl                  : # the subpath of your site, e.g. "/blog"
repository               : # GitHub username/repo-name e.g. "mmistakes/minimal-mistakes"
(뒷부분 생략)
수정된 설정 파일은 다음과 같습니다.
# Welcome to Jekyll!
#
# This config file is meant for settings that affect your entire site, values
# which you are expected to set up once and rarely need to edit after that.
# For technical reasons, this file is *NOT* reloaded automatically when you use
# `jekyll serve`. If you change this file, please restart the server process.

remote_theme : mmistakes/minimal-mistakes
minimal_mistakes_skin    : "default" # "air", "aqua", "contrast", "dark", "dirt", "neon", "mint", "plum", "sunrise"

# Site Settings
locale                   : "en-US"
title                    : "Site Title"
title_separator          : "-"
name                     : "Your Name"
description              : "An amazing website."
url                      : "https://yourname.github.io" # the base hostname & protocol for your site e.g. "https://mmistakes.github.io"
baseurl                  : "" # the subpath of your site, e.g. "/blog"
repository               : # GitHub username/repo-name e.g. "mmistakes/minimal-mistakes"
(뒷부분 생략)
설정 파일에서 이외에도 제목, 저자, 설명, 페이스북 설정 등 원하는 대로 설정을 바꾸셔도 됩니다.
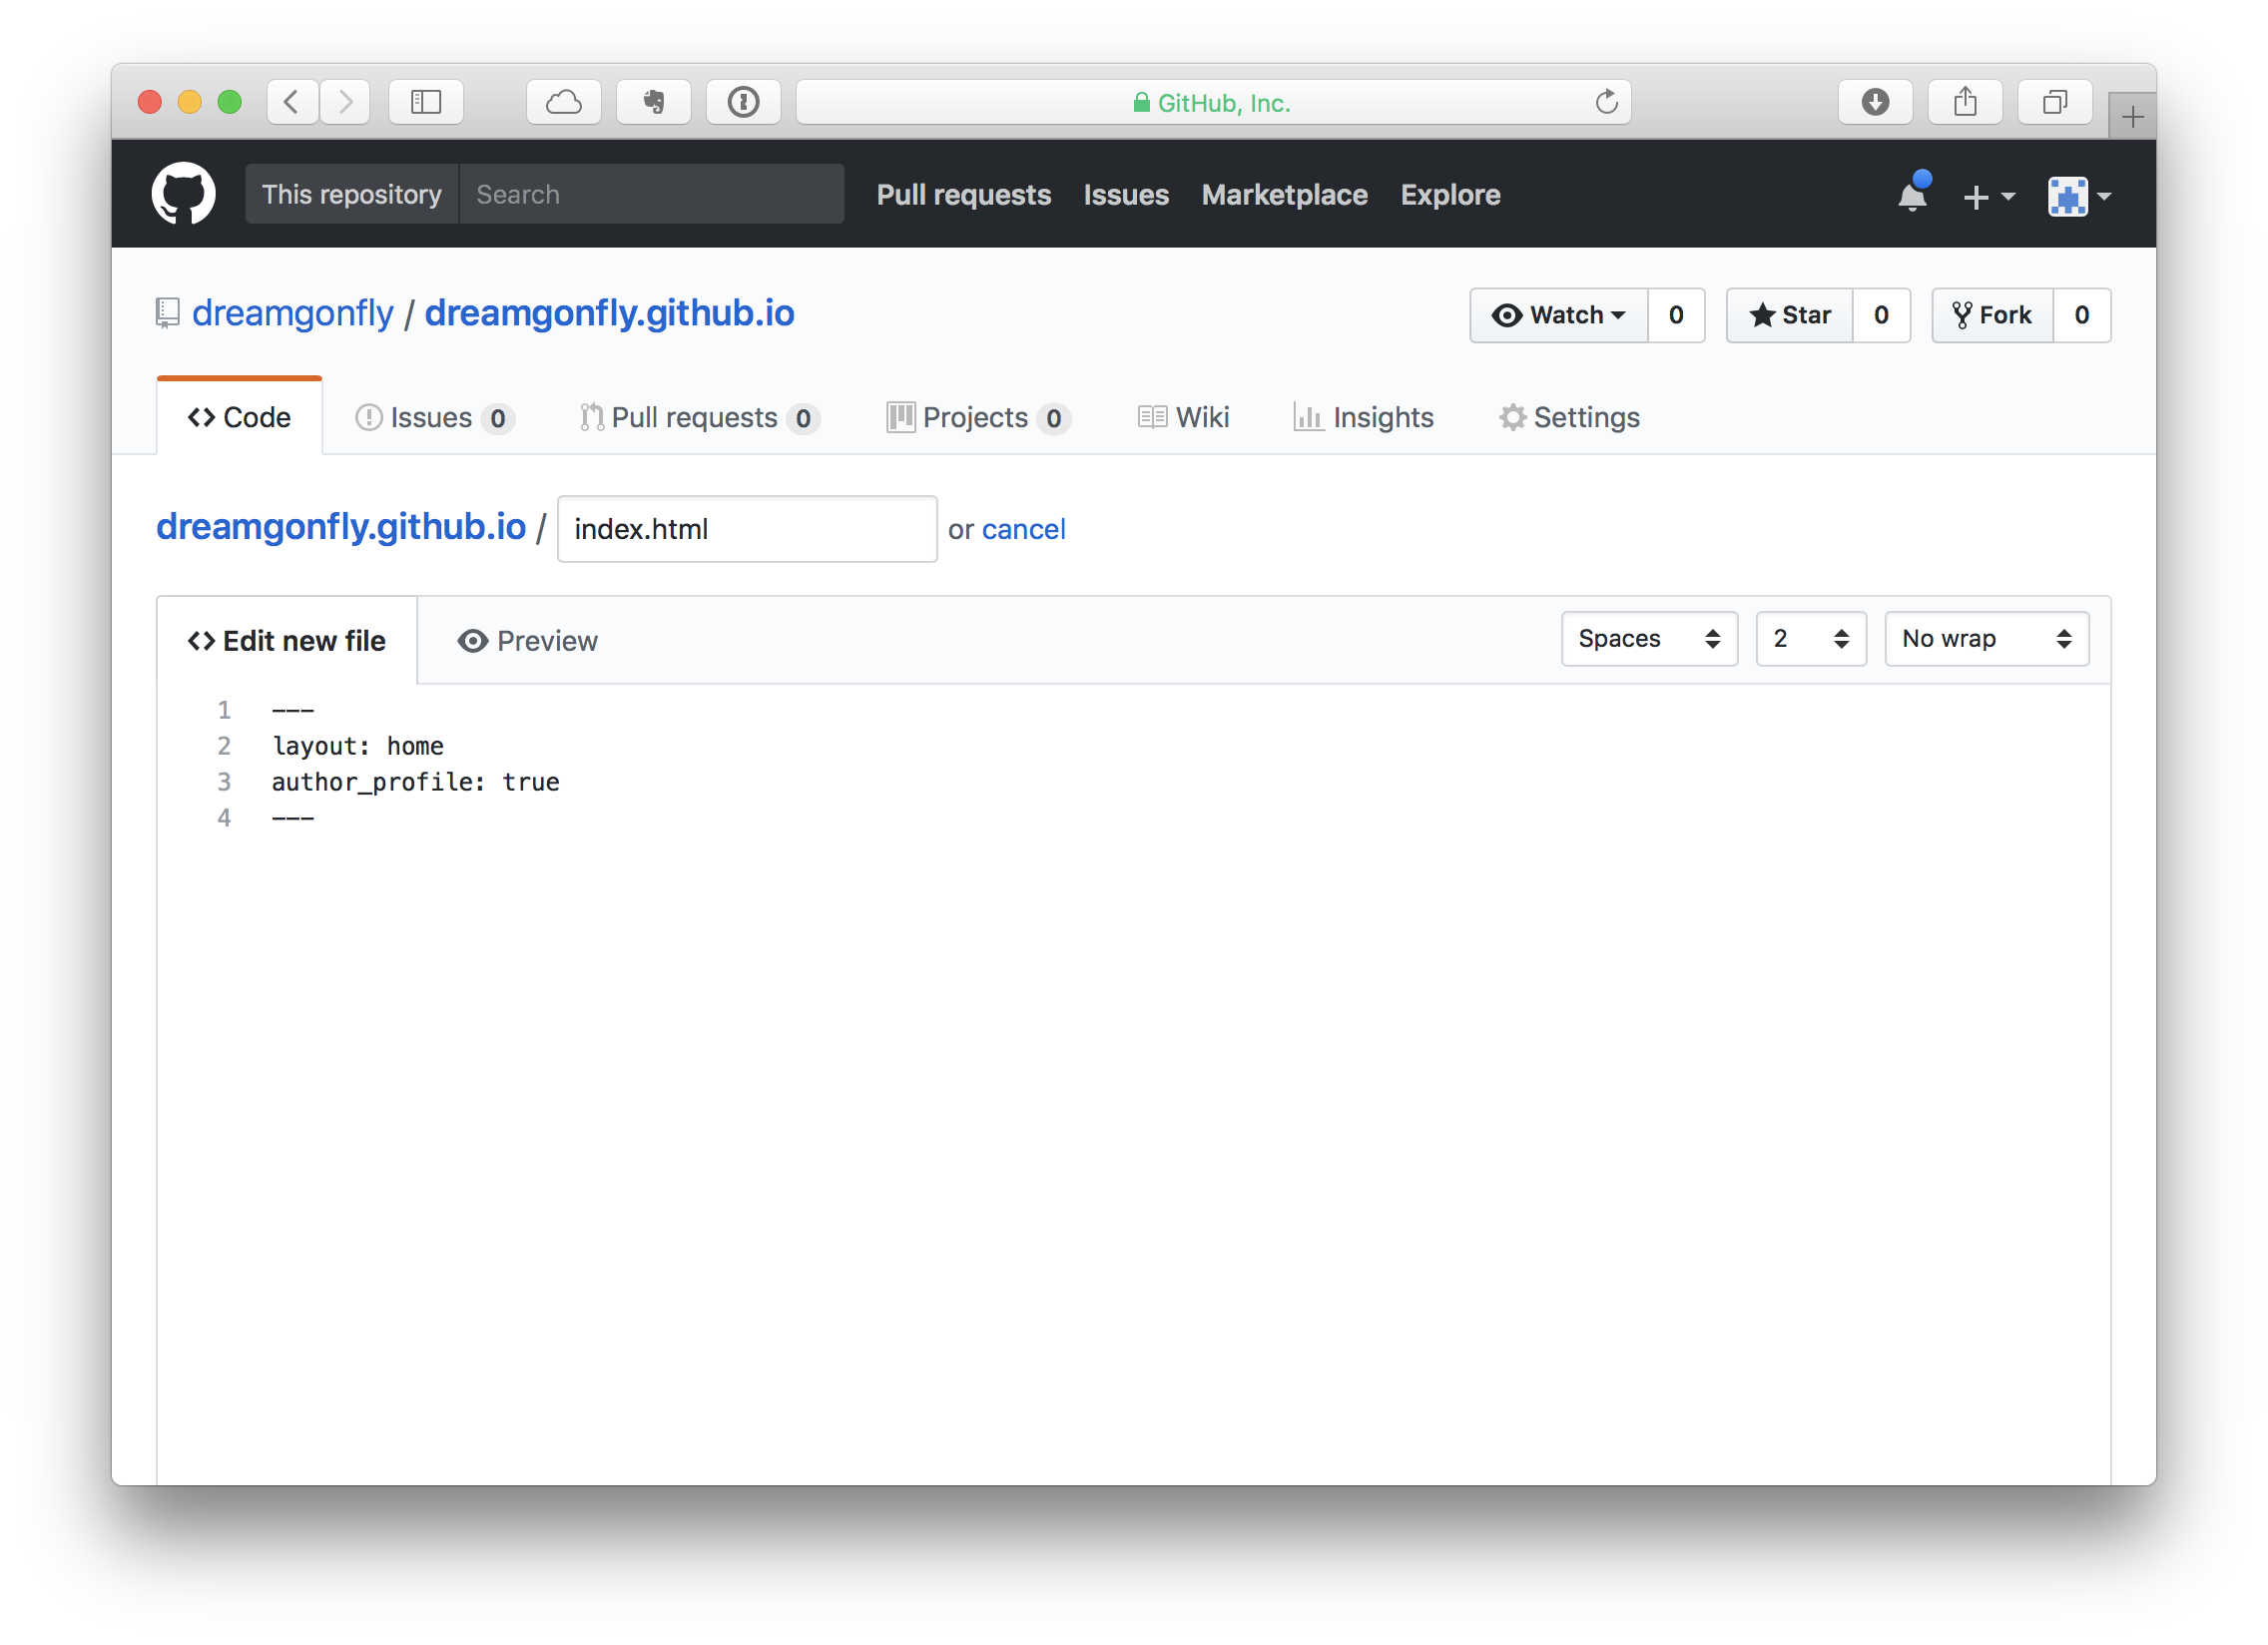
4. index 파일 가져오기#
- 선택한 테마 저장소(repository)에서
index.html,index.md등의 파일을 찾습니다. 이 예시에서 사용하는 테마는index.html이라는 이름의 파일로 있습니다. 이 파일이 Jekyll이 사이트를 생성할 때 가장 처음 보여주는 페이지입니다. index파일과 동일한 이름과 동일한 내용의 파일을 자신의 저장소(repository)에서도 만듭니다. 이 예시에서index.html의 내용은 다음과 같이 몇 줄 되지 않습니다.
---
layout: home
author_profile: true
---
테마에 따라서 추가로 가져와야 하는 파일이 있을 수도 있습니다. 예를 들어 어떤 테마에서는 posts.md라는 파일이 있어야 합니다. 페이지가 제대로 작동하지 않는다면 테마에 따라서 필요한 파일을 확인해 주세요.
5. _posts에 새 글 쓰기#
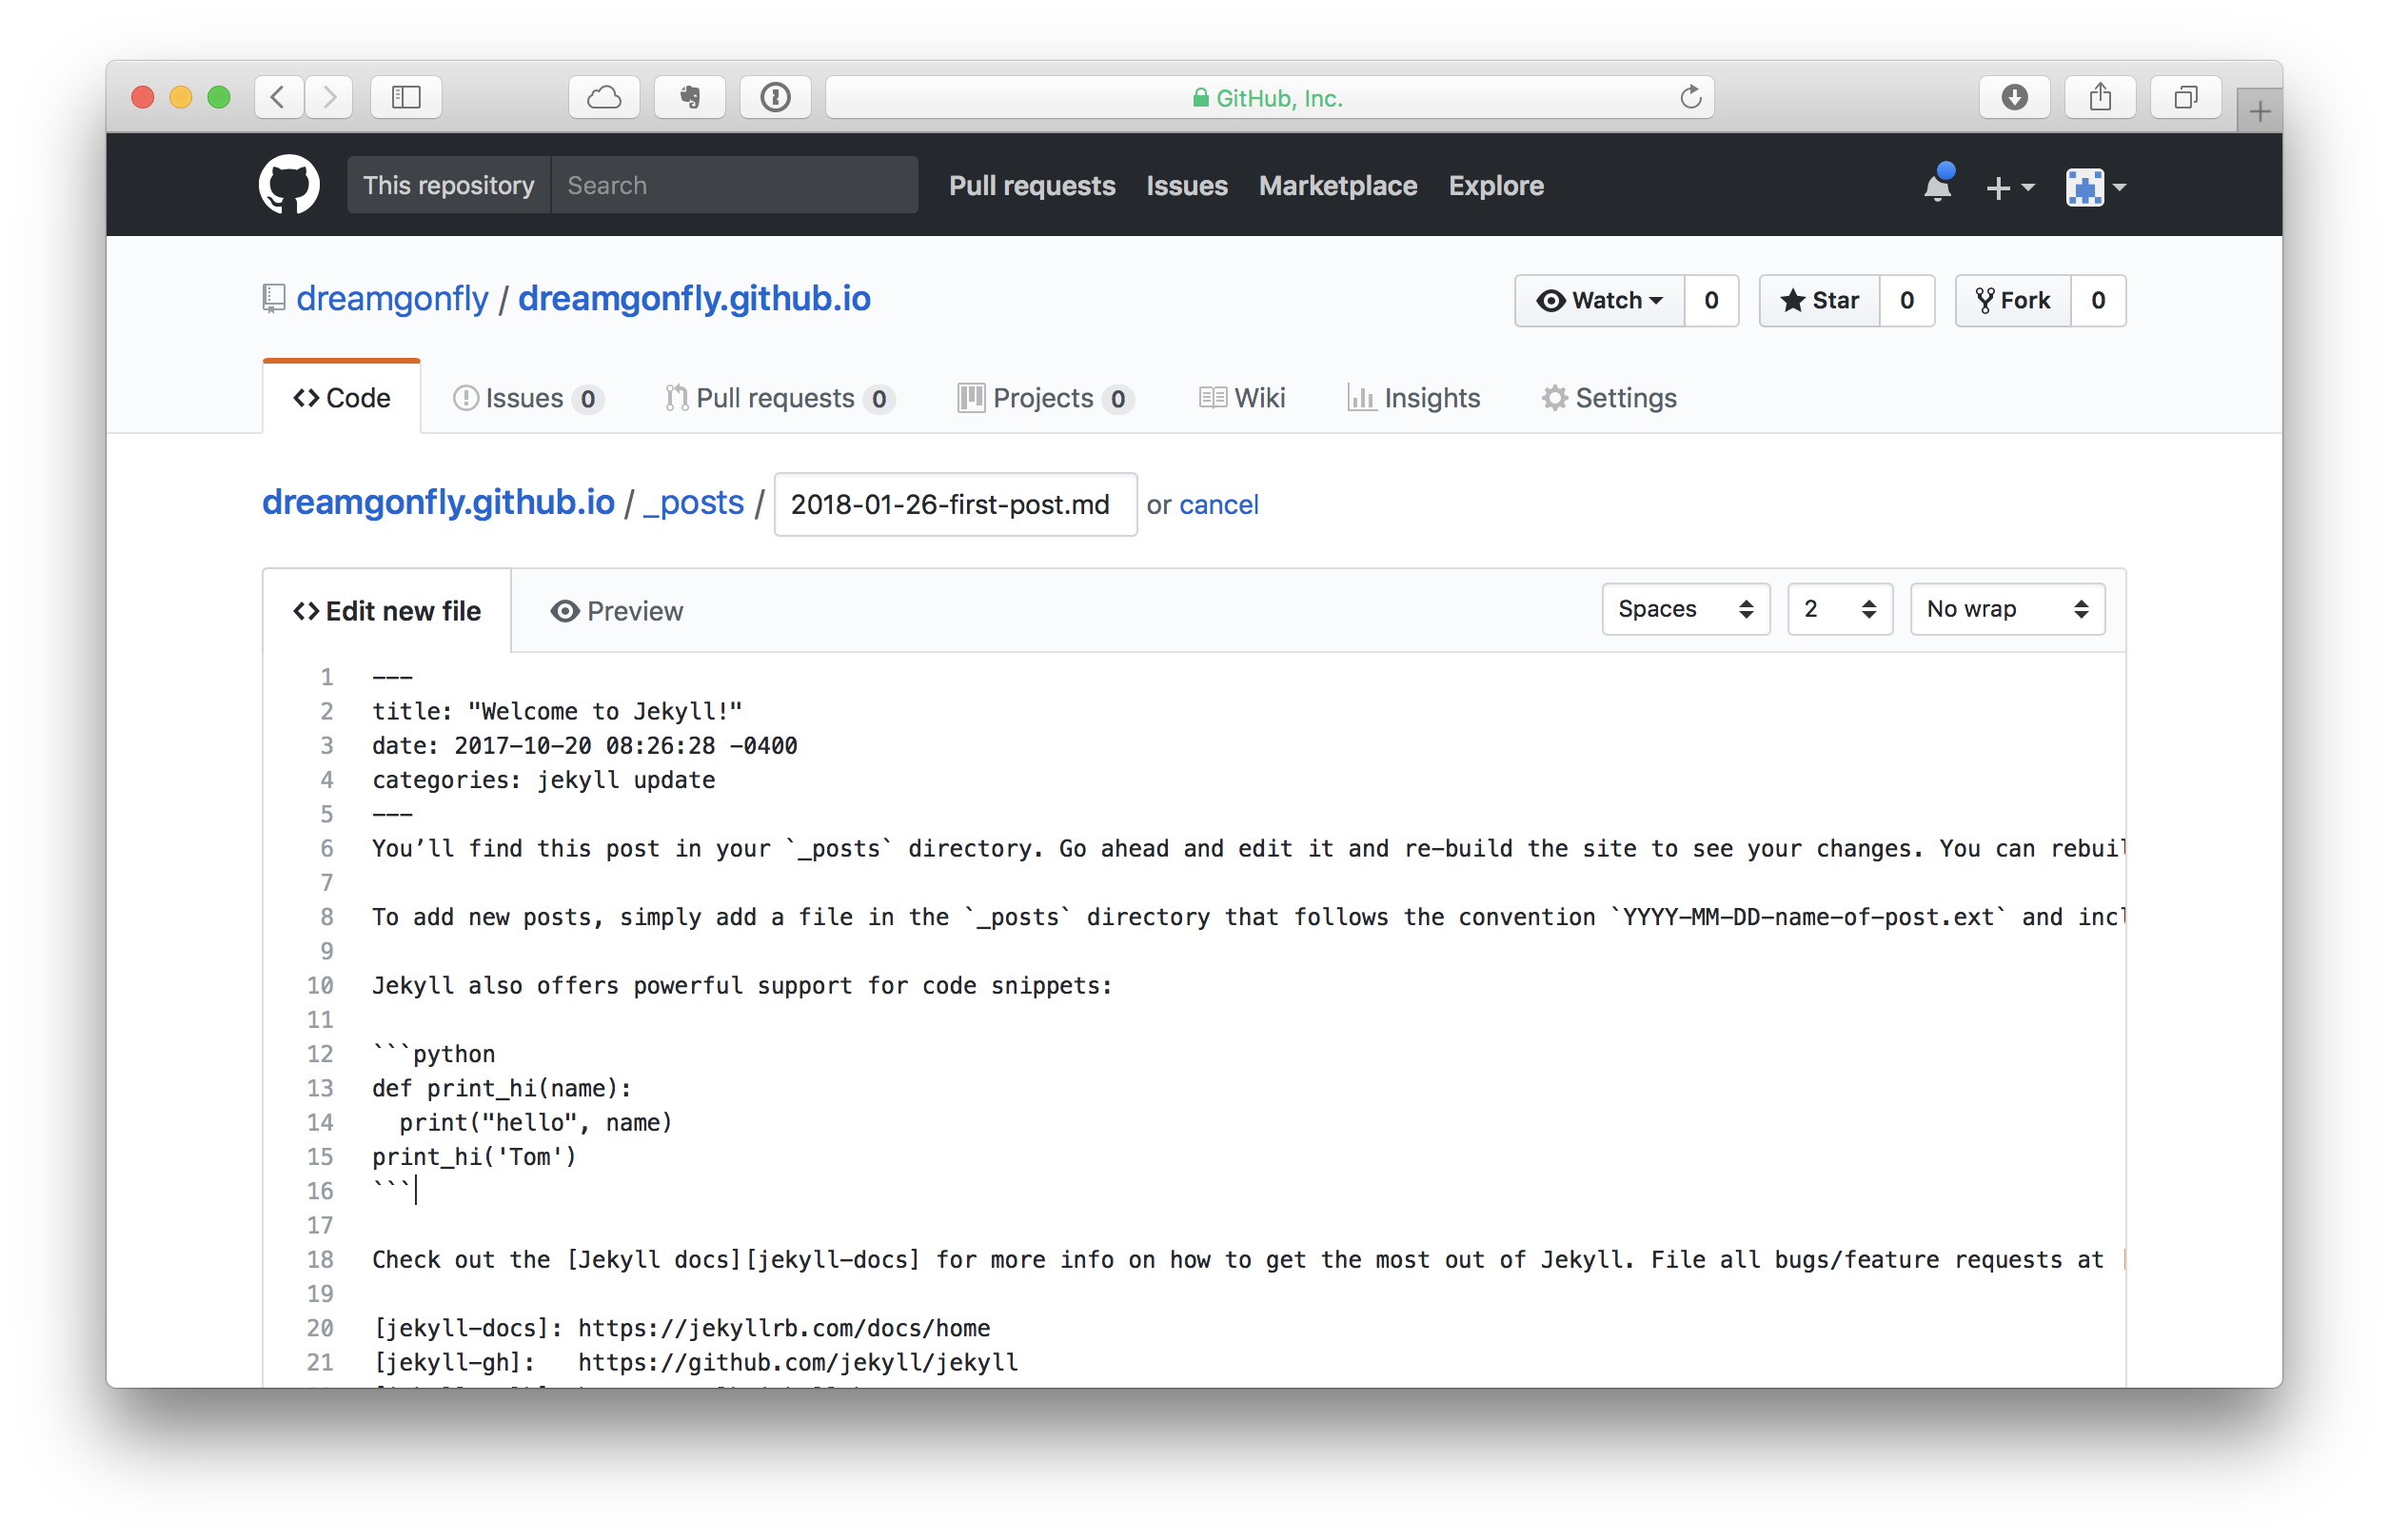
- 자신의 GitHub 저장소에서 Create new file을 눌러 새 파일을 생성합니다.
- 파일 이름에
_posts/2018-01-26-first-post.md을 입력합니다. 이 때/앞의_posts는 폴더 이름으로 인식되며 GitHub에서 자동으로 폴더를 생성합니다. Jekyll은_posts아래의 markdown 글들을 블로그 포스트로 인식하고 블로그에서 보여주는데요. 파일 이름은 일반적으로YYYY-MM-DD-name-of-post.md형식으로 짓습니다. - 파일 내용 맨 처음에는 다음과 같이 글의 제목과 날짜 등을 적어줍니다. 이 형식은 Front matter라고 불리며, Jekyll에서 글의 메타 데이터를 확인하는 방법입니다. 테마에 따라서 여기에 들어가는 정보가 조금씩 다를 수 있으니 각 테마 별로 예시를 확인해 주세요.
---
title: "Welcome to Jekyll!"
date: 2017-10-20 08:26:28 -0400
categories: jekyll update
---
- 이 뒤의 내용은 무엇을 쓰셔도 좋습니다. 다음은 제가 사용한 예시 파일의 전문입니다.
---
title: "Welcome to Jekyll!"
date: 2017-10-20 08:26:28 -0400
categories: jekyll update
---
You’ll find this post in your `_posts` directory. Go ahead and edit it and re-build the site to see your changes. You can rebuild the site in many different ways, but the most common way is to run `jekyll serve`, which launches a web server and auto-regenerates your site when a file is updated.
To add new posts, simply add a file in the `_posts` directory that follows the convention `YYYY-MM-DD-name-of-post.ext` and includes the necessary front matter. Take a look at the source for this post to get an idea about how it works.
Jekyll also offers powerful support for code snippets:
```python
def print_hi(name):
print("hello", name)
print_hi('Tom')
```
Check out the [Jekyll docs][jekyll-docs] for more info on how to get the most out of Jekyll. File all bugs/feature requests at [Jekyll’s GitHub repo][jekyll-gh]. If you have questions, you can ask them on [Jekyll Talk][jekyll-talk].
[jekyll-docs]: https://jekyllrb.com/docs/home
[jekyll-gh]: https://github.com/jekyll/jekyll
[jekyll-talk]: https://talk.jekyllrb.com/
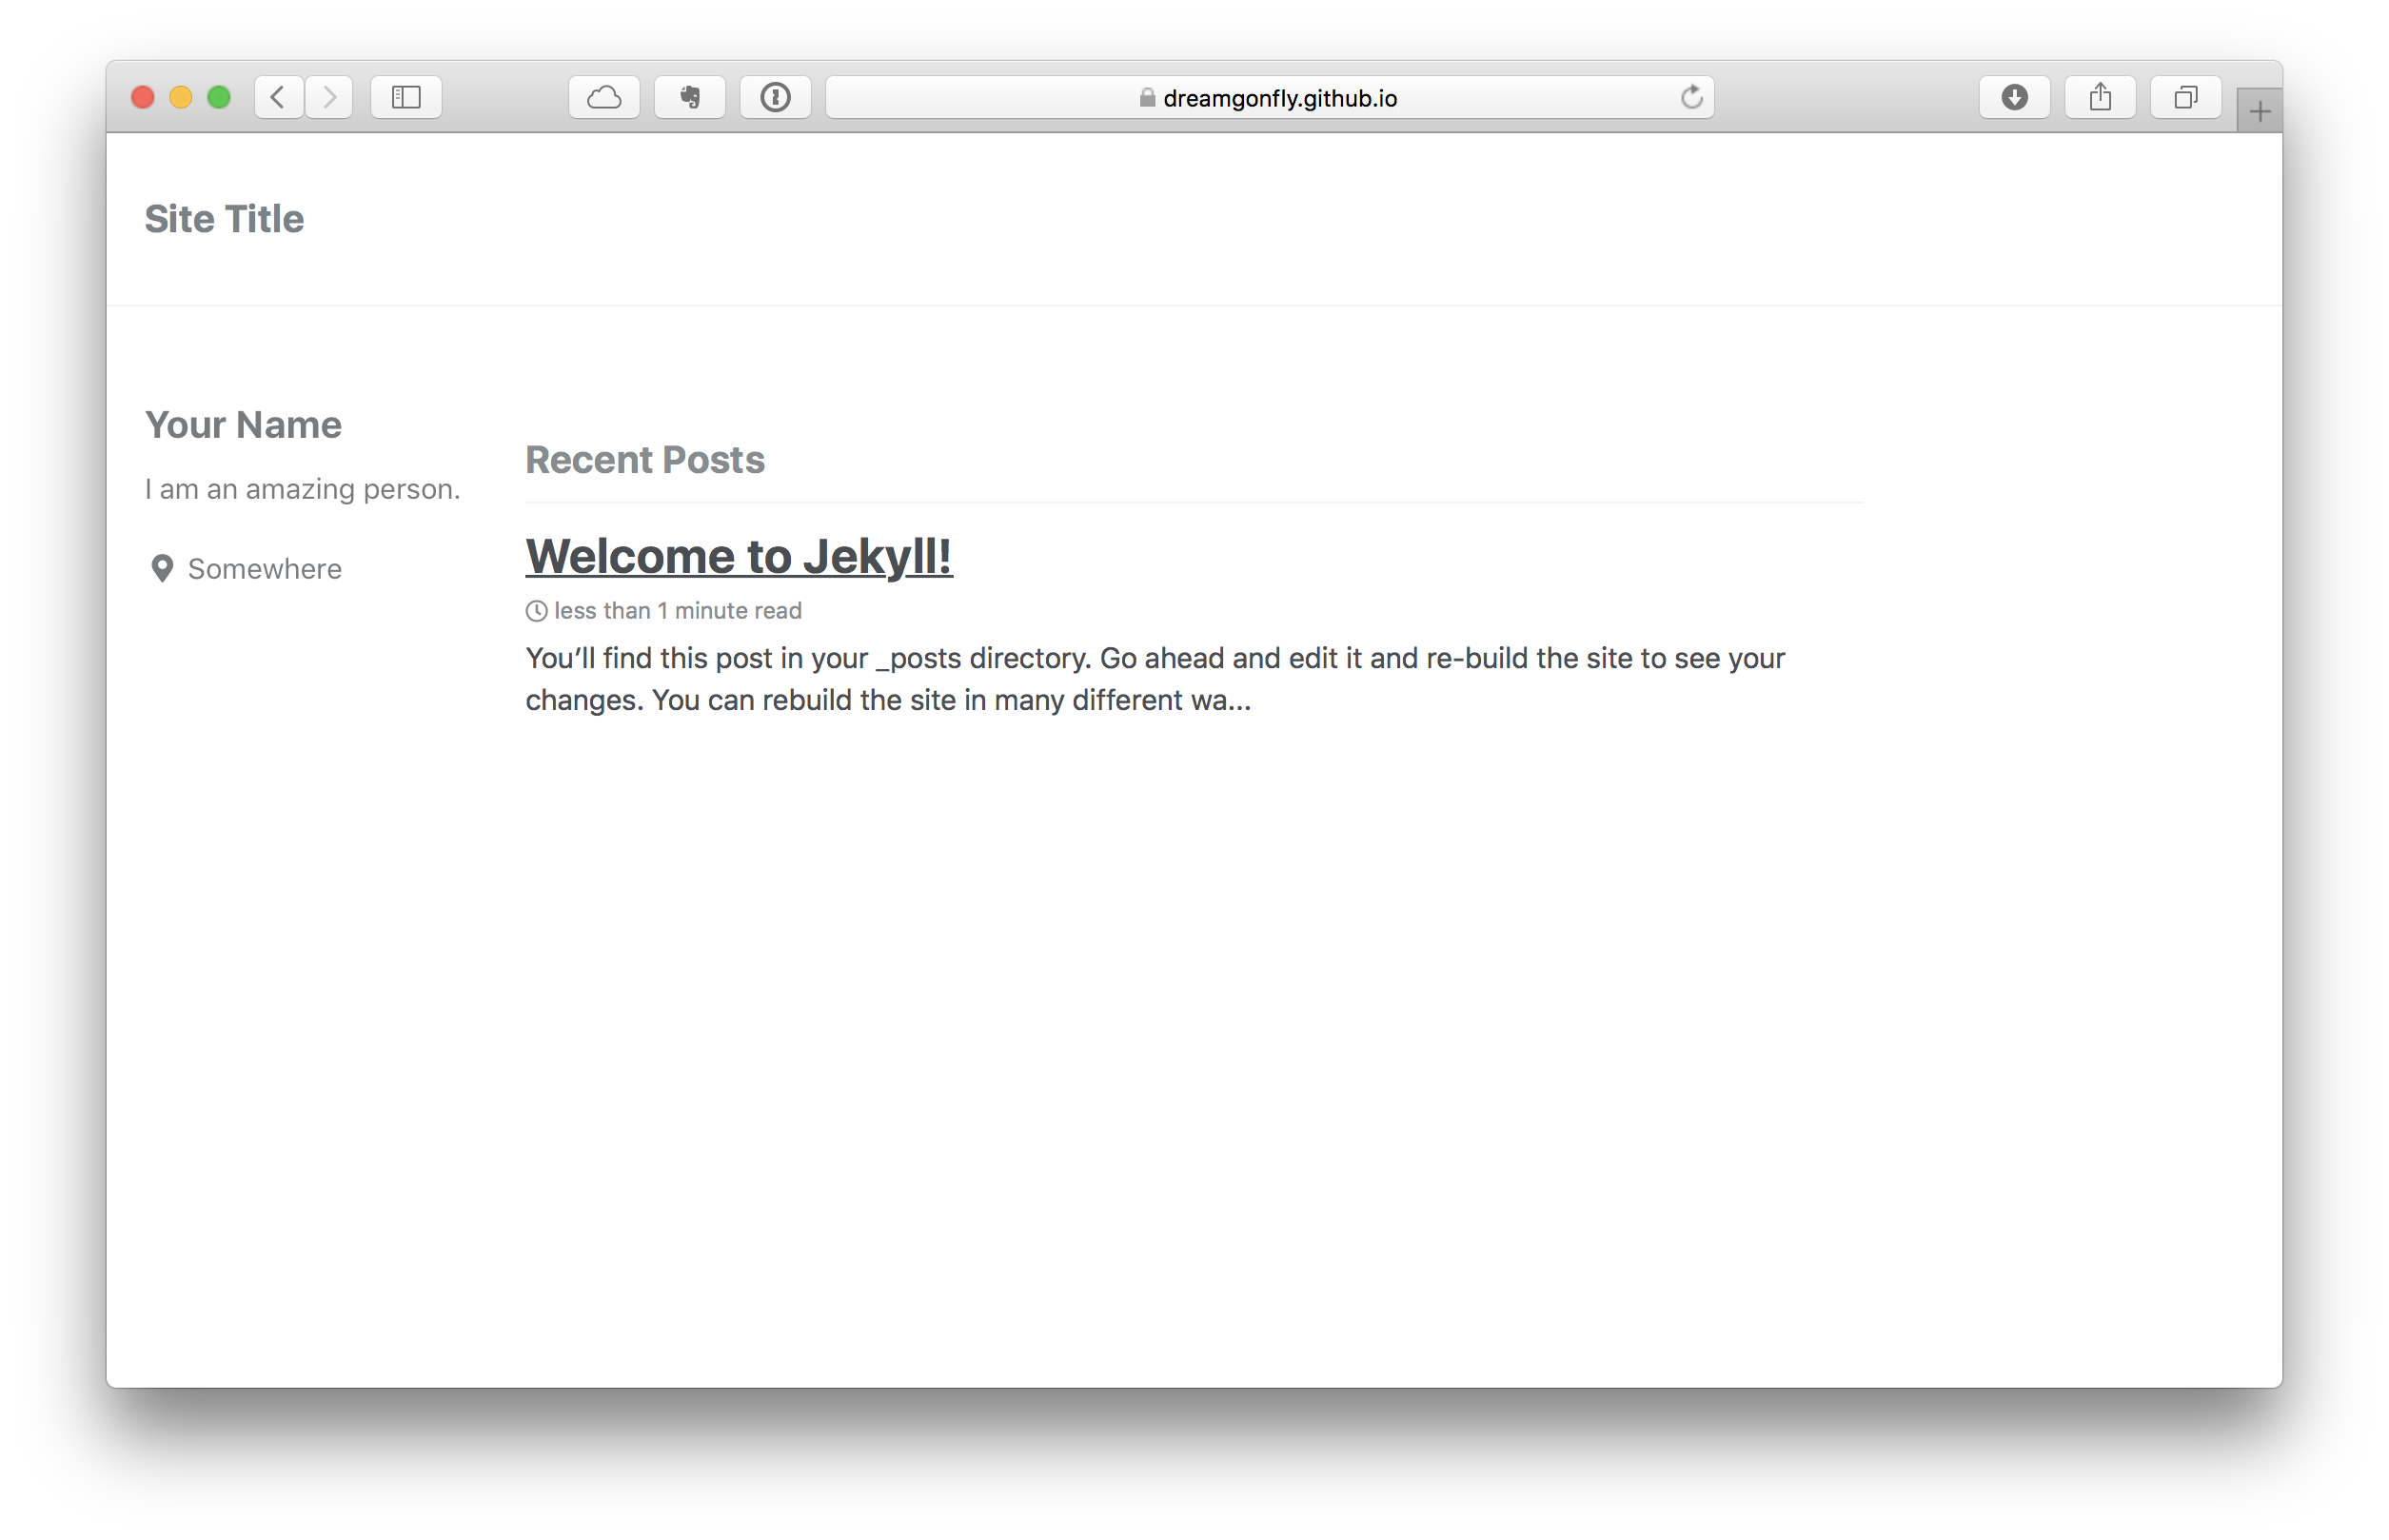
확인하기#
yourname.github.io로 접속하여 GitHub Pages가 잘 만들어졌는지 확인할 수 있습니다.
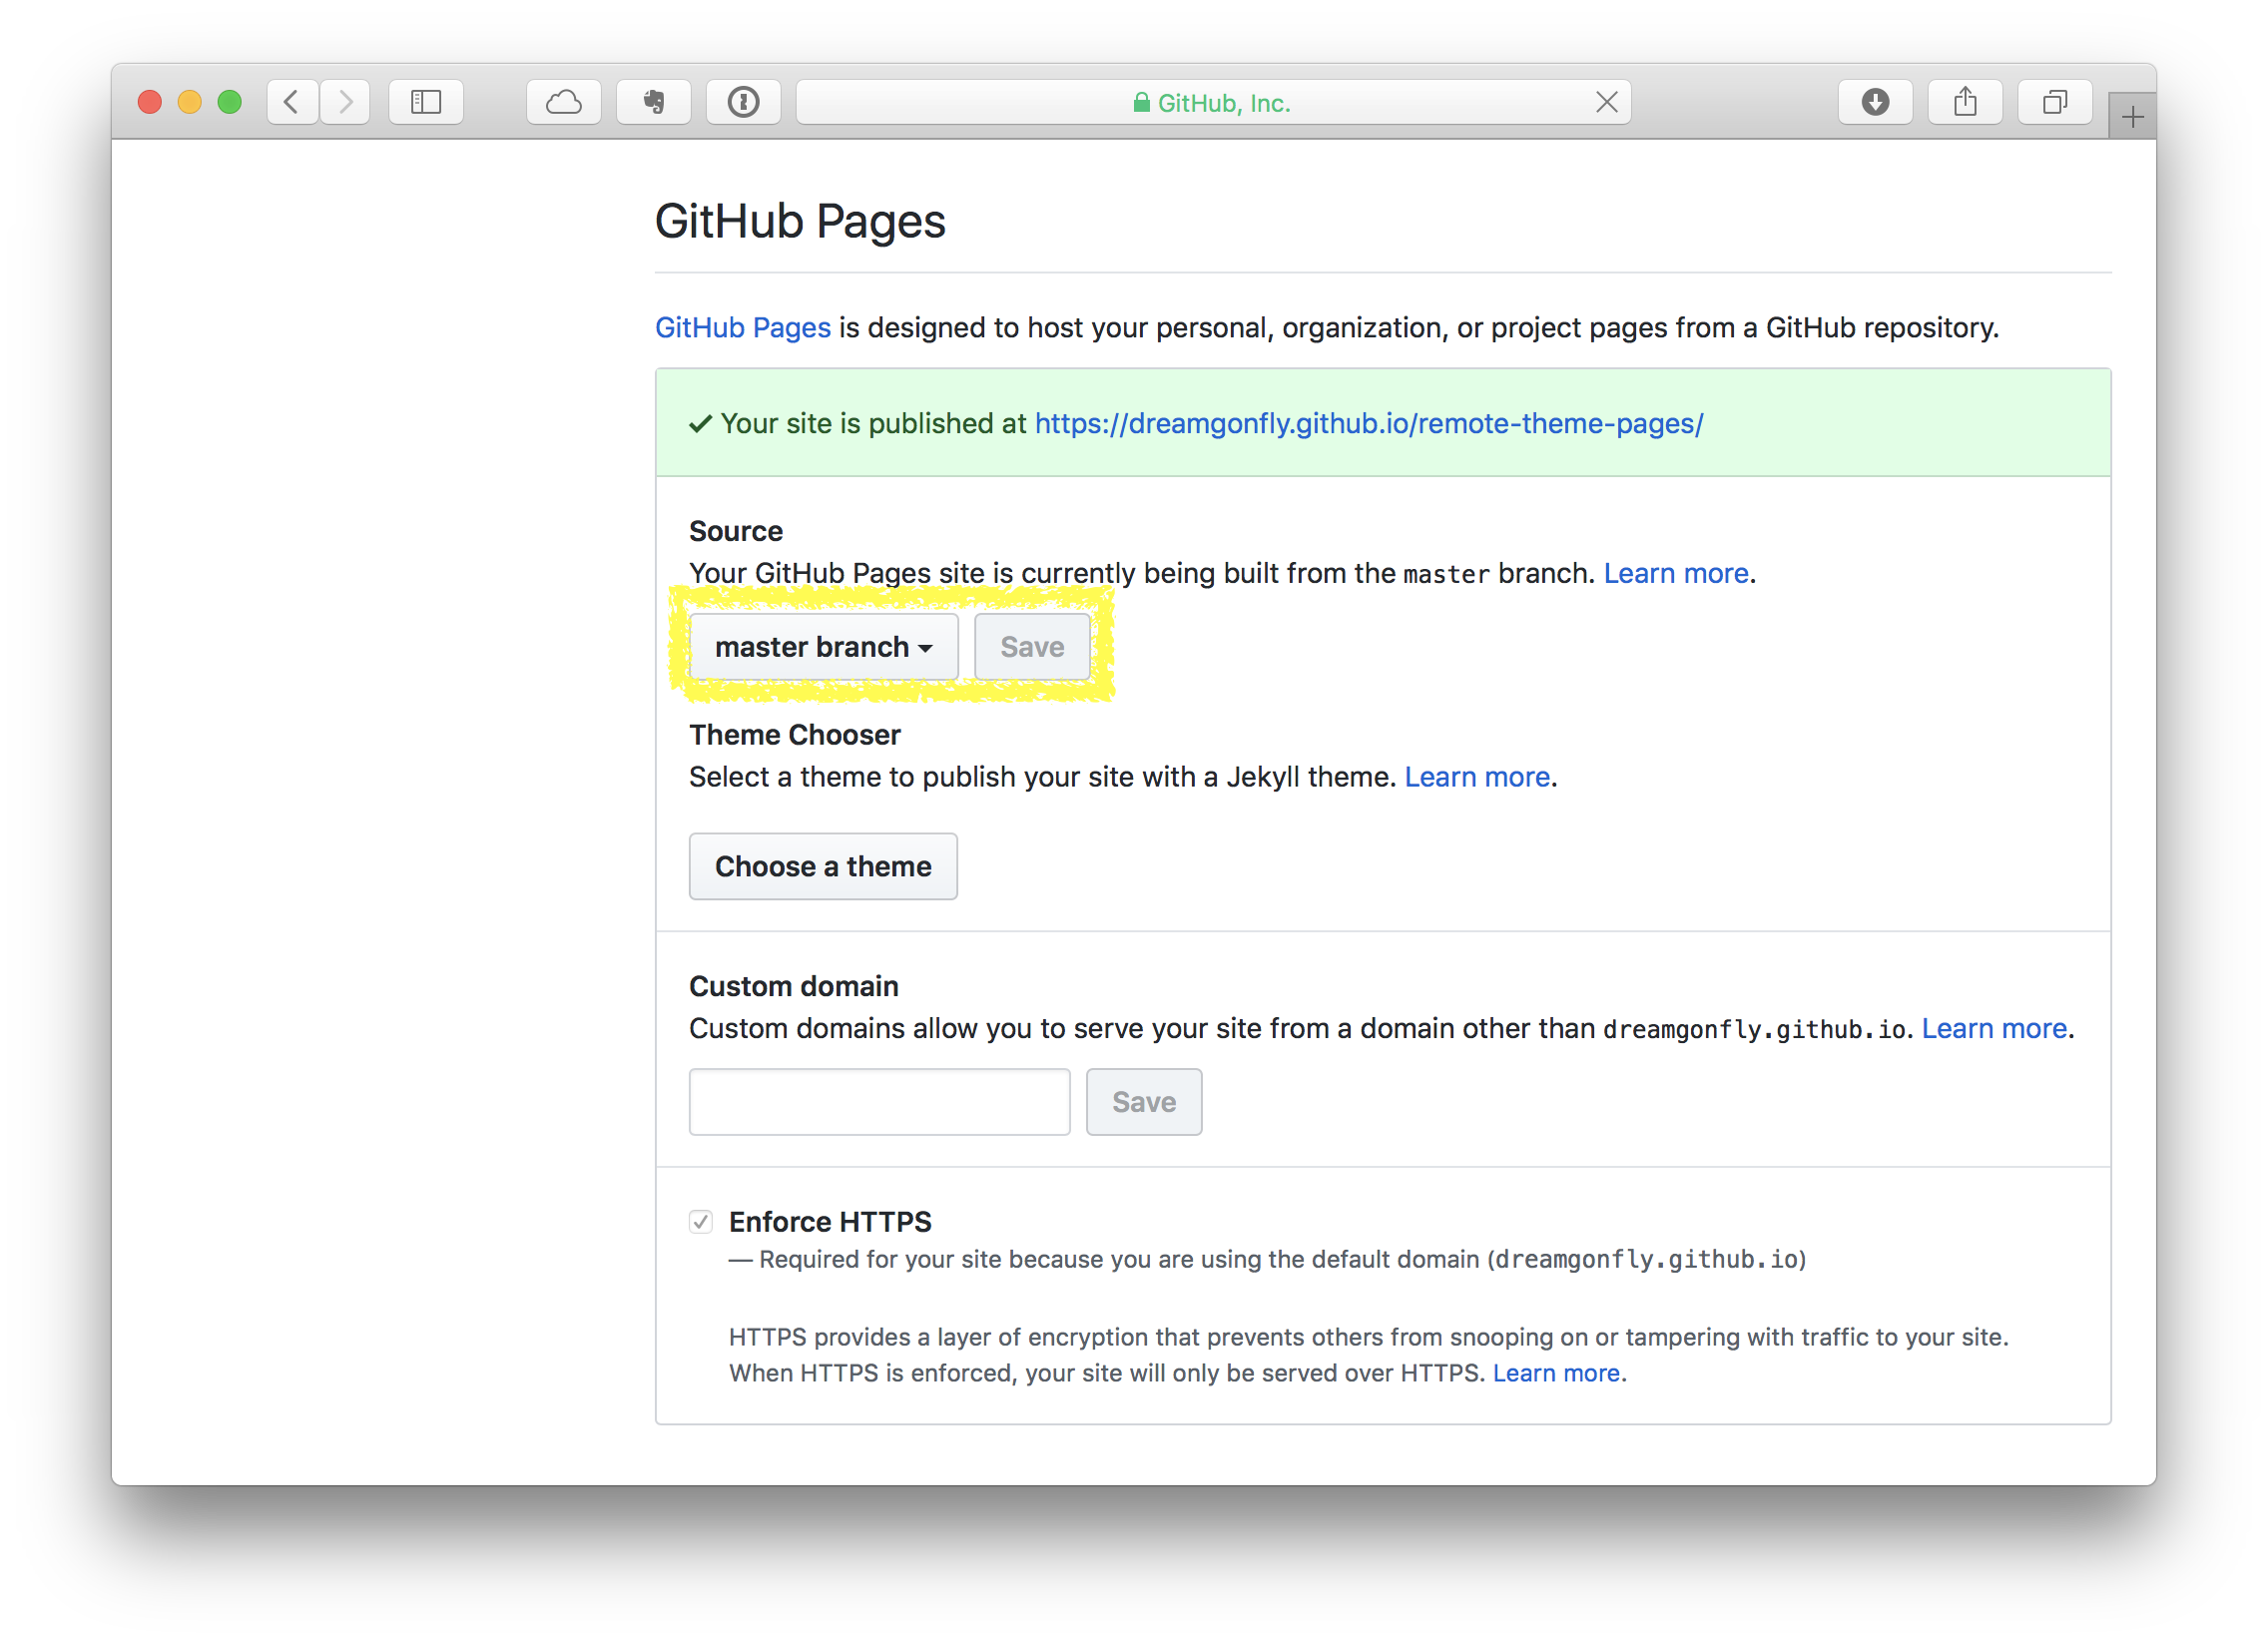
프로젝트 별 페이지 만들기
프로젝트 별 페이지를 만들 때는 한가지 과정이 더 필요합니다. 바로 GitHub 설정에서 Gihub Pages를 활성화하는 것입니다. (
yourname.github.io라는 이름의 저장소는 이 설정이 자동으로 활성화되어 있습니다.)GitHub 저장소 메뉴 중에 Settings에 들어간 뒤 스크롤을 내리면 GitHub Pages 설정을 볼 수 있습니다. 여기에서 Source를 master branch로 설정한 뒤 Save를 누르면 GitHub Pages 설정이 완료되고, 접속할 수 있는 url이 나타납니다. 이 url로 들어가 GitHub Pages가 제대로 작동하는지 확인할 수 있습니다. url은
https://yourname.github.io/projectname의 형식으로 보이게 됩니다.
마치며#
이 글에서 소개드린 방법의 핵심은 jekyll remote theme이었습니다. Jekyll remote theme은 GitHub에 공개되어 있는 어떤 Jekyll 테마든지 가져와서 쓸 수 있도록 하는 Jekyll의 플러그인입니다. Jekyll remote theme이 GitHub Pages에 내장되어 있었기 때문에 이 글에서 소개한 방법이 가능했던 것입니다.
물론 이 방법으로는 블로그의 css 등을 커스터마이징하는 것은 불가능합니다. 커스터마이징을 하기 위해서는 자신만의 _layouts, _includes, _sass, assets 등의 폴더들을 만들어야 합니다. (다른 말로 하면, jekyll remote theme은 이 폴더들의 내용을 지정한 테마에서 가져옵니다.) 또한 자신의 로컬 컴퓨터에 Jekyll 환경을 설치하고 빌드해 보아야 합니다. 자세한 내용은 Jekyll의 공식 웹사이트를 참고해야 합니다.
커스터마이징을 하지 않고 이미 공개된 테마를 그대로 쓰고 싶다면 remote theme은 최소한의 설정으로 원하는 Jekyll 테마를 사용할 수 있는 쉽고 빠른 방법입니다.